Appearance
JWT Bearer
The JWT Bearer connection stores the details required to obtain an access token from an OAuth2 authorisation server using the JWT Bearer grant (RFC 7523), where a signed JSON Web Token is presented directly as proof of identity instead of a shared client secret. This is commonly used for server-to-server authentication scenarios where a static secret is undesirable, such as authenticating with Google service accounts.
Creating a JWT Bearer Connection
To add a new JWT Bearer Connection:
- Go to the Connections section in AireGlu.
- Click the Add button.
- Select JWT Bearer as the connection you want to create
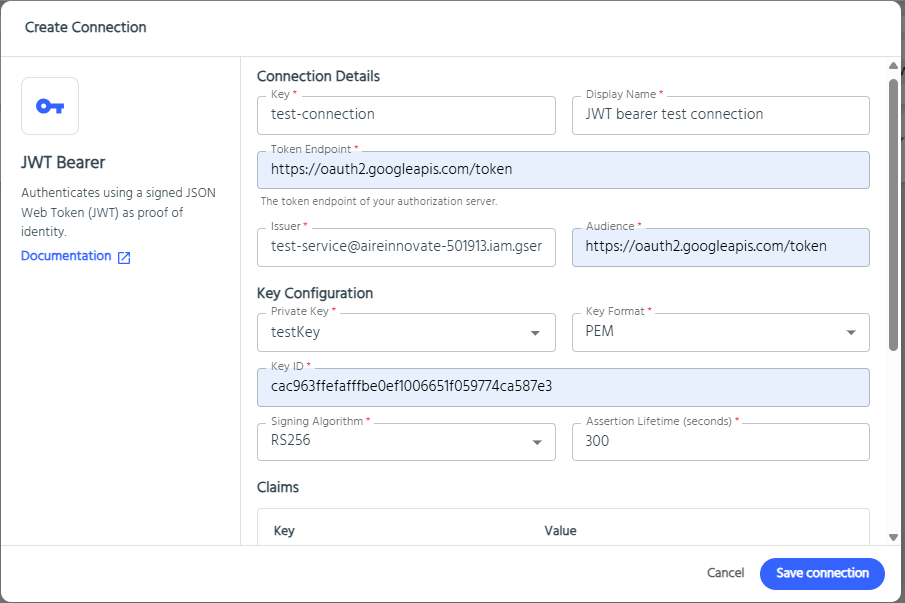
- Fill in the required fields:
- Key: A unique identifier for this connection (e.g.,
my-jwt-bearer). - Display Name: A friendly name for easy reference.
- Token Endpoint: The token endpoint URL provided by your authorisation server.
- Issuer: The
issclaim for the signed assertion - typically the client or service account identifier recognised by your authorisation server. - Audience: The
audclaim for the signed assertion. This must match what your authorisation server expects. For many providers, including Google, this is the same value as the Token Endpoint.
- Key: A unique identifier for this connection (e.g.,
- Under Key Configuration, provide the details of the key used to sign the JWT assertion:
- Private Key: Reference an AireGlu secret that contains the private key.
- Key Format: Choose JWK or PEM depending on the format of your private key.
- Key ID: The key identifier (
kid) associated with the private key. - Signing Algorithm: The algorithm used to sign the assertion (e.g.,
RS256). - Assertion Lifetime: How long, in seconds, the signed assertion is valid for, up to a maximum of 3600 seconds (60 minutes).
- (Optional) Add any Claims required by your authorisation server (e.g.,
scope). Note thatiss,aud,iat,exp,nbfandjtiare reserved and cannot be set here, as AireGlu manages these automatically. - (Optional) Add any additional Parameters required by your authorisation server's token request. Note that
grant_type,assertionare reserved and cannot be set here. - Click Save connection.
Using a JWT Bearer Connection in HTTP Request Tasks
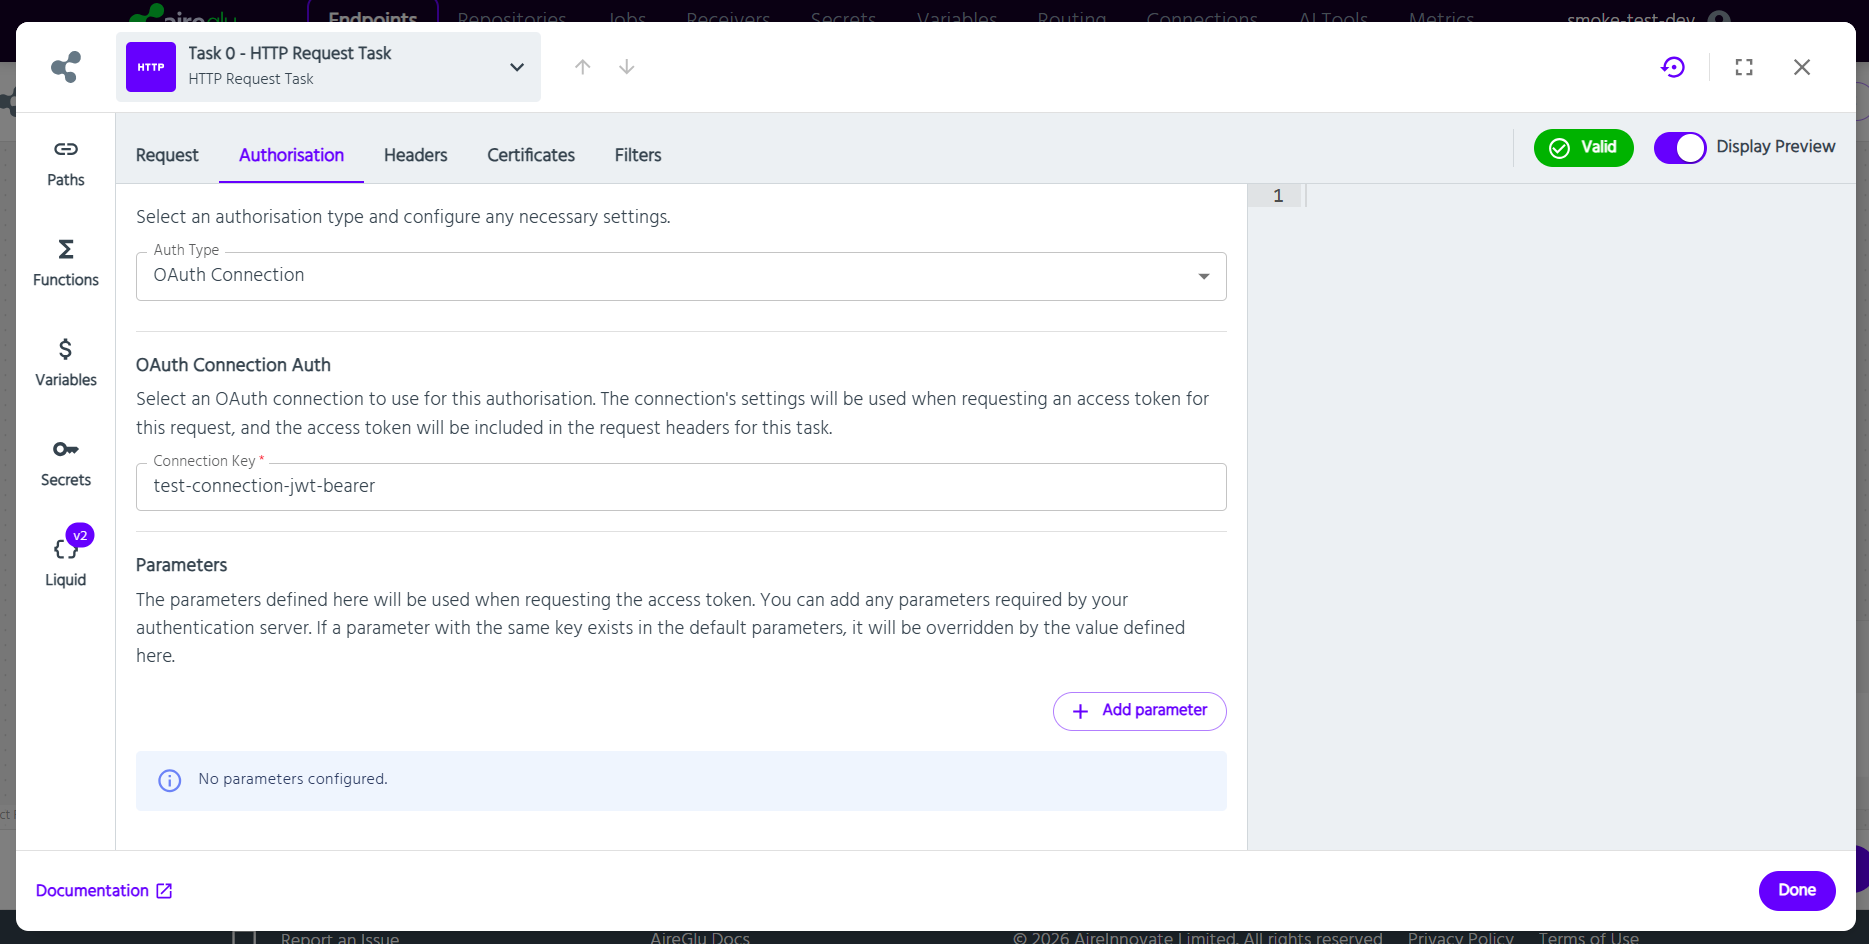
Once you have created a JWT Bearer Connection, you can use it to authenticate HTTP requests in your endpoint tasks:
- In your endpoint, add or edit an HTTP Request Task.
- Go to the Authorisation tab.
- Set Auth Type to Client Connection.
- Search and select the desired JWT Bearer Connection.
- (Optional) Override any parameters for this specific request.
When the task runs, AireGlu will automatically:
- Build and sign a JWT assertion using the connection's configured Issuer, Audience, Claims and private key.
- Exchange the signed assertion for an access token using the
urn:ietf:params:oauth:grant-type:jwt-bearergrant. - Inject the resulting bearer token into the HTTP request's
Authorizationheader. - Handle token caching and retries as needed, so you don't have to worry about token management in your endpoint.
- In the event of an authentication failure, the task will log the error details in the metrics under the "Usage Data" tab, allowing you to troubleshoot issues with token retrieval or authentication.
This makes it easy to securely call external APIs that require the JWT Bearer grant, such as Google service accounts, without manually handling assertion signing in your workflow.